Imagine settling in for your favorite album—only to hear faint crackles, pops, or skips. Every vinyl lover knows that sting, when cherished records start to lose their brilliance.
Truth is, a little neglect adds up fast. Dust, oils, poor storage (or just plain forgetfulness) can turn a pristine collection into a graveyard of warped, scratchy discs. It’s not just annoying—it steals the warmth and magic from every play.
But here’s the thing: with a record care checklist printable and a few smart habits, you’ll keep your vinyl sounding vibrant for decades. Stick around and you’ll get crystal-clear steps—and a printable checklist—to make it effortless.
Why Proper Vinyl Record Care Matters
Why does record care matter so much—really? It’s easy to fall for the romance of vinyl and miss what’s quietly at stake: your music’s future.
The truth is, vinyl records are delicate. Every dust particle, fingerprint, and mishandled edge gradually eats away at sound quality. That irreplaceable first pressing? It can lose its warmth and depth from just a few nights of careless stacking. According to the Vinyl Alliance, poor storage is the main cause of warping and loss of fidelity—costing collectors hundreds, even thousands, in lost value over time.
💡 Pro Tip: Always return records to their sleeves immediately after playing. This helps guard against airborne dust and sunlight, both silent enemies of your collection.
In practice: think about getting a rare record clean and ready, only to discover faint surface noise that wasn’t there before. Maybe your favorite Miles Davis cut now pops or skips—the enjoyment fades, replaced by frustration. Proper care is your insurance. It preserves not just the physical groove, but the story and memory pressed into each side.
- Preserves Value: Well-maintained records hold (and often increase) their resale worth, unlike neglected ones.
- Keeps Sound Pristine: Dust, static, and oil build-up distort audio purity—clean records deliver the warmth vinyl promises.
- Saves Money: Proper habits mean fewer replacements and professional cleanings—something the Library of Congress’s preservation department highly recommends for any long-term collection.
| Risk | Cause | Prevention |
|---|---|---|
| Warping | Exposure to heat/sunlight | Store vertically, cool, shaded areas |
| Surface Noise | Dust, static, careless handling | Use anti-static brush before & after play |
| Faded Artwork | UV exposure, moisture | Keep sleeves away from damp areas |
Picture this scenario: you inherit a crate of classic LPs from a relative. Half are well-loved, carefully sleeved—those play beautifully, rich and full. The others? Warped, crackly, with faint covers. The difference? Consistent care, not luck.
But there’s one detail most owners completely overlook until it’s too late…
Tools And Supplies You’ll Need For Record Maintenance
Ever wonder what separates flawless vinyl playback from the frequent snap, crackle, and pop? It isn’t luck—it’s the right tools and supplies, always within arm’s reach. Investing a bit in a maintenance kit not only protects your music but saves you money and heartache down the line. But what do you really need?
- Carbon fiber anti-static brush: Removes dust and neutralizes static, preventing surface noise and groove damage. Absolutely essential for every play.
- Record cleaning solution: Specially formulated fluids dissolve grime and lift fingerprints. Avoid using regular household cleaners—they can degrade vinyl over time.
- Microfiber cloths: These non-abrasive, lint-free cloths are perfect for quick wipe-downs after applying cleaning solution.
- Inner sleeves (poly or rice paper): Protects your records from paper dust, static, and scratches once they’re back in their jackets.
- Stylus brush: Gently sweeps debris off your needle—critical for avoiding wear on both stylus and records. Most manufacturers (like Audio-Technica) advise quick cleaning after each use.
- Optional: Record cleaning mat, record vacuum, and a proper storage crate. Each adds a layer of long-term protection—especially for serious collectors.
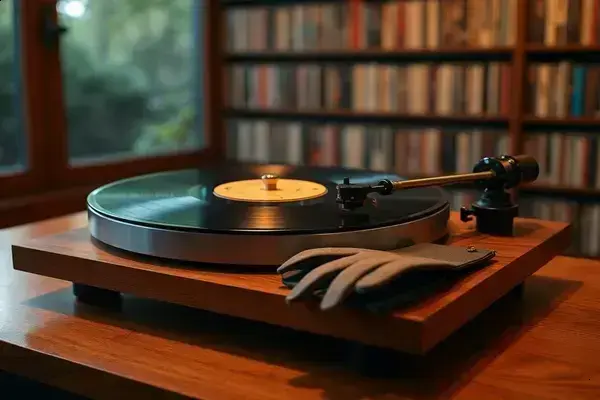
💡 Pro Tip: Never touch a record’s playing surface with your bare hands. Use cotton gloves if possible and always handle by the edges or label. According to the British Library Sound Archive, even tiny oil traces can dull sound and attract more dust.
| Tool | Purpose | Preferred Use |
|---|---|---|
| Anti-static brush | Dust & static removal | Before & after each play |
| Cleaning solution + microfiber | Deep cleaning, grime removal | Monthly or when needed |
| Stylus brush | Needle care | Every listening session |
In practice: you pick out Saturday night’s record. With a quick pass of an anti-static brush, a gentle sweep of a stylus tool, and perfectly stored inner sleeves, you’re rewarded with music that sounds as vibrant as the day it was pressed. The experience isn’t just about protection—it’s about honor and respect for your collection. What actually works might surprise you…
Step-By-Step Guide To Cleaning And Handling Records
Think cleaning records is just about running a cloth over the surface? That’s a recipe for scratches, static buildup, and—worst of all—permanent groove damage. Here’s the thing: cleaning and handling need a method, not a quick swipe.
- Anti-static record brush
- Vinyl-safe cleaning solution
- Microfiber cloth
- Stylus brush
- Cotton or nitrile gloves (optional for collectors)
- Prepare Your Area: Find a clean, dust-free workspace with a soft mat or towel underneath. Keep liquids and food far away—accidents happen fast.
- Start With a Dry Brush: Gently run an anti-static brush over the record while it’s spinning or laid flat. Move in the direction of the grooves, not across them. This pulls off loose dust before it can grind in during wet cleaning.
- Apply Cleaning Solution: Add a few drops of vinyl-safe cleaner to a microfiber cloth (never straight onto the record). Using light pressure, wipe the surface in a smooth, circular motion following the grooves. Avoid the label area—moisture can cause lasting damage.
- Dry and Inspect: Let the record air dry upright for a few minutes. Check under good light for smudges or residue. Repeat cleaning steps for persistent grime, but don’t over-wet the surface.
- Handle the Record Properly: Always hold by the edges and labeled center. Avoid touching grooves; use gloves if you tend to leave fingerprints. Place back in a fresh inner sleeve when done.
- Clean the Stylus: Use a stylus brush to gently sweep debris off the needle, moving back to front only (never side-to-side). This quick step prevents audio distortion and stylus wear, as emphasized by the Audio Engineering Society in their guidelines.
⚠️ Important Warning: Never use tap water or household cleaners. Chlorine and detergents can degrade vinyl and leave lasting deposits that taint sound quality.
In practice: picture this scenario—a friend finds a stack of thrift store LPs caked in dust. After a methodical clean, they’re amazed how rich and hiss-free their first spin becomes. A little mindful care makes old records sing like new. And this is exactly where most people make the most common mistake…
Common Mistakes To Avoid When Storing Vinyl
Ever slid a record onto your shelf and thought, “It’ll be fine for now”? Storing vinyl wrong is a mistake that sneaks up on even the most obsessive collectors. The damage shows gradually—edge warping, static build-up, faded sleeves—and by the time you notice, it’s too late for an easy fix.
- Stacking Records Flat: This causes the bottom albums to bear the weight, leading to warping and permanent groove distortion. Always store records vertically, like books on a shelf.
- Using Paper Inner Sleeves Only: Basic paper sleeves can trap dust and create micro-scratches. Poly-lined or pure polyethylene sleeves protect better over years of use.
- Leaving Records Near Heat or Sunlight: Direct sun warps vinyl, and high temperatures deform both record and sleeve. Keep your collection away from windows, radiators, and electronics that emit heat.
- Ignoring Humidity: Too much moisture creates mold and warps jackets. Too little can make sleeves brittle. The U.S. Library of Congress recommends storing vinyl between 45–50% relative humidity for long-term preservation.
💡 Pro Tip: Check every few months for tightness on your shelves. Crammed racks put records under pressure; too much space lets them tilt and bend. Aim for just the right snugness, like a row of classic books.
| Mistake | Consequence | Best Practice |
|---|---|---|
| Flat Stacking | Edge warping, groove crush | Vertical storage, even pressure |
| Poor Sleeves | Dust and scratches | Poly-lined or rice paper sleeves |
| Heat/Sun Exposure | Warped vinyl & faded art | Store in cool, shaded area |
| Humidity Ignored | Mold, inner paper decay | Maintain stable humidity (45-50%) |
In practice: picture this scenario—a collector finds a box of old LPs in a hot attic, stacked tight and wrapped in plastic. The covers are stuck together, records warped beyond play. If only someone had kept them on a bookshelf in the living room, away from the heat. And this is exactly where most people make the most common mistake…
Printable Record Care Checklist You Can Use Today
What if keeping your entire record collection in top condition could be as easy as following a single sheet? A printable record care checklist turns guesswork into certainty—no more missed steps, no more overlooked cleanings. Think of it as your own personal vinyl maintenance manager, always on duty.
The best checklists include the essential routines that add years of life (and value) to your albums. Here’s what you’ll typically find:
- Daily/Before Playing: Dust with anti-static brush, check stylus, handle by edges, inspect sleeve condition.
- Weekly: Deep clean most-played records, rotate storage positions, review humidity and temperature in the storage area.
- Monthly: Replace worn sleeves, update catalog, do visual sound quality checks, record play counts for rare LPs.
- Annually: Inspect all records for possible mold or warping, review insurance and collection appraisals, upgrade cleaning accessories.
💡 Pro Tip: Keep the filled checklist taped inside your record cabinet or digitize it on your phone for instant reference. According to the Association for Recorded Sound Collections, documenting your routine streamlines insurance claims and makes future appraisals easier.
| Task | How Often | Notes/Date |
|---|---|---|
| Dust with anti-static brush | Before each play | |
| Deep clean records/sleeves | Weekly | |
| Rotate shelf storage | Weekly | |
| Check for warping/mold | Annually | |
| Update collection log | Monthly |
In practice: imagine finding a rare pressing in mint shape, simply because you checked off “inspect for warping” every year without fail. That’s peace of mind—for your ears and your investment. Once this is in place, the rest of the routine falls into place naturally.
Your Vinyl’s Best Years Start Now
If you take just one thing from this guide, let it be: a little consistent attention with the right steps keeps your record care checklist printable collection sounding sharp and looking beautiful for years. Using quality tools, cleaning smart, avoiding storage slips, and sticking to a routine truly make all the difference.
Remember the old worries—crackles, warping, sleeves ruined by sunlight? That was before you knew what to look out for and exactly how to care. Now, you’re the person whose LPs pull gasps — crystal clear, no fuzz, and covers that look museum-ready. It’s not luck. You’ve got a process, and your records show it.
What’s your #1 challenge keeping your vinyl in top shape, or is there a record you’re hoping to rescue? Share your experience or questions in the comments below — I’d love to hear your story!

Miles Aaron Sutton is a vinyl record enthusiast and turntable collector dedicated to helping music lovers set up, maintain, and grow their vinyl collections. With years of hands-on experience building home listening setups and hunting for records, Miles built Vsomi to be the honest, practical vinyl resource he always wished existed when he was starting out.