
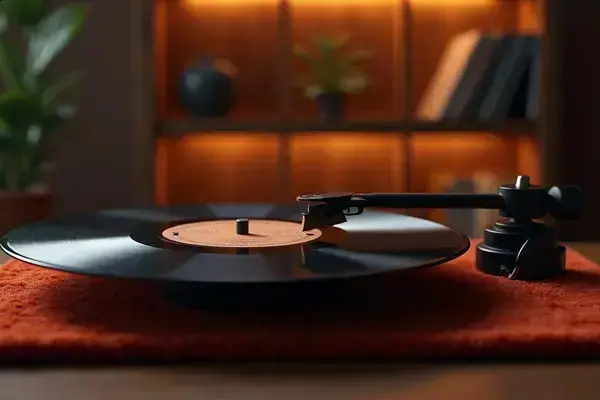
Picture dropping the needle on your favorite record—only to hear those sharp pops and crackles that just won’t quit. It’s not just nostalgia you’re listening to, it’s static electricity sabotaging your listening experience, one song at a time.
If you’ve tried to brush it off (literally) and still found dust clinging for dear life, you know the frustration. Static isn’t only annoying; it attracts all kinds of grime, making your collection age faster while your patience wears thin. Every replay means risking surface noise, possible skips, or even permanent scratches.
By the time you reach the end of this guide, you’ll know exactly how to remove static vinyl records and, more importantly, how to keep those pesky charges from coming back. Ready to actually enjoy your music—noise free?
Why Static Happens On Your Vinyl Records
Why do perfectly clean records still crackle and pop? It’s not always dirt or scratches — it’s static electricity. When you pull a vinyl record from its sleeve, materials like plastic and paper can transfer an electrical charge directly onto the surface. Suddenly, dust and debris start clinging, and audio purity takes a hit before the needle even drops.
The nature of vinyl is the culprit. Polyvinyl chloride (PVC), the material your records are pressed from, is a natural insulator. That means static charges build up fast and take a long time to leave unless you do something about it. Environmental factors only make things worse: low humidity, forced air heating, and synthetic clothing can turn your listening room into a static magnet.
💡 Pro Tip: The Library of Congress preservation guidelines recommend keeping your audio collection in rooms with relative humidity between 40–55% to minimize static buildup and prevent warping. Even a small humidifier makes a difference, especially in winter.
What’s Actually Happening?
In practice: imagine sliding a record out of a brand-new inner sleeve. It’s so glossy it squeaks. You set it on the platter, ready for some Miles Davis — but tiny fibers immediately cling to the record’s surface. No matter how many times you brush them off, new specks appear the second you put the record away and pull it out again. That’s static in action, turning your collection into a dust magnet.
| Cause | Static Effect | Prevention Tip |
|---|---|---|
| Low Humidity | Faster charge buildup | Use a room humidifier |
| Plastic/Paper Sleeves | Friction-induced static | Switch to anti-static sleeves |
| Synthetic Clothing | Extra static transferred by touch | Wear natural fibers |
What’s wild is the surface charge isn’t always obvious. Sometimes, you’ll hear loud pops and clicks during playback; other times the problem is gradual dust buildup, cutting sound quality over time.
But there’s one detail most owners completely overlook until it’s too late…
The Risks Of Ignoring Static Buildup
Ever wonder what really happens if you let static pile up on your records? It’s not just a minor irritation or a few pops here and there — the risks go much deeper. Static builds up as a charge on the vinyl’s surface, attracting dust, hair, and tiny abrasive particles that stick stubbornly for every spin.
Here’s the thing: every time a record with static attracts debris and that grit sits in the grooves, your stylus doesn’t just trace sound — it grinds abrasive particles into both vinyl and diamond. Over time, that means both record and stylus lifespan shrink. Suddenly, albums you love lose clarity, and you’re shelling out for replacements way sooner than expected.
⚠️ Important Warning: According to the Audio Engineering Society, excessive static can accelerate stylus wear by as much as 20% compared to playing on neutralized records. That’s not just noise — that’s real money wasted over a collection’s lifetime.
Damages That Go Beyond Mere Sound
Picture this scenario: you dusted off a favorite pressing, put it on after months in the sleeve, and heard countless micro-pops instead of music. No album should sound like a campfire. Over several plays, dust and static form a glue, embedding debris where cleaning can’t always reach. Gradually, once-bright tracks turn flat or fuzzy.
- Permanent Groove Damage: Static-fueled particles can etch micro-scratches impossible to repair without costly professional intervention.
- Stylus Degradation: Extra debris and static buildup require more frequent stylus replacements — which isn’t cheap, especially for high-end cartridges.
- Playback Inconsistency: Some records will suddenly skip or distort, even with a balanced tonearm. The culprit’s often static buildup, not alignment issues.
Even insurance carriers like Collectibles Insurance Services warn that static-related surface damage may not be covered under most policies — loss of value is on you, not them. And honestly? The emotional cost of a ruined favorite LP is something no refund can fix.
What actually works might surprise you…
Step-By-Step: How To Remove Static Safely
Ready to banish that stubborn static and rescue your vinyl’s true sound? Most people skip a crucial step or use the wrong order — and end up puzzled when the pops and crackles return within a day. You want your cleanup to be both safe and lasting, not a quick-fix that wears off before the next play.
- Anti-static brush (carbon fiber preferred)
- Microfiber cleaning cloth
- Distilled water
- Record cleaning solution (alcohol-free)
- Antistatic inner sleeves
- Optional: Anti-static gun (e.g. Milty Zerostat 3)
- Ground Yourself First: Touch a metal object — turntable chassis or an outlet screw — before handling records to release any charge from your body.
- Dry Brush the Record: Hold the vinyl on your palm and use a carbon fiber brush in gentle circles, following the grooves, to lift dust and drain away static. Go slow — more contact time means better results.
- Apply Cleaning Solution: For stubborn static, mist a microfiber cloth lightly with a record-safe solution or distilled water. Don’t spray the record directly. Wipe in a single smooth motion, always following the grooves.
- Let It Air Dry: Set the record upright in a clean, dust-free spot for a few minutes so all moisture (and static) is completely gone before returning to its sleeve.
- Use An Anti-static Gun: (Optional, but highly effective.) Hold 12 inches away, trigger once or twice over each side. This device works by emitting ions that neutralize static without physical contact. The Library of Congress Preservation Division lists these as among the safest tools for delicate records.
- Store In Antistatic Sleeves: Always finish by slipping the record into a fresh antistatic inner sleeve that resists charge buildup. Paper and plastic-only sleeves are static magnets; upgrading here pays off long-term.
💡 Pro Tip: Do this whole process somewhere free from carpets and synthetic fabrics, which can reintroduce static fast — hardwood or tile floors are best.
In practice: think of the difference after you follow all six steps. You go from wrestling with endless fuzz and pops to spinning a glossy, whisper-quiet record that stays clean after each play. These routines are used by pro archivists and audiophile enthusiasts — so you know they’re truly effective, not a fad.
And this is exactly where most people make the most common mistake…
Best Tools And Products For Static Removal
There’s no shortage of products promising static-free records, but which tools really earn a spot in your setup? Whether you’re just starting or chasing audiophile-level sound, picking the right anti-static tool makes a measurable difference in clarity and groove life.
| Product | Type | Best For |
|---|---|---|
| AudioQuest Anti-Static Record Brush | Carbon fiber brush | Daily dry dust removal |
| Milty Zerostat 3 | Anti-static gun (manual) | Quick static neutralization |
| Mobile Fidelity Original Master Sleeves | Antistatic inner sleeves | Long-term storage |
Each tool targets a different pain point in static removal. Brushes like the AudioQuest let you sweep away dust and dissipate charge before every listen — just run it gently over the grooves. The Milty Zerostat 3 emits positive and negative ions to instantly neutralize static without touching the record’s surface, meaning zero added risk for scratches.
💡 Pro Tip: Combine a carbon fiber brush with antistatic inner sleeves for the best one-two punch. The sleeves (think Mobile Fidelity or Diskeeper by Sleeve City) block charge buildup between plays, while the brush handles active dust and static before every spin.
In practice: you might pull a classic album from an antistatic sleeve, zap it once with the Zerostat, and brush it before the drop. That’s less than one minute per record — and pays off every time you hear pure music instead of background crackle. The Vinyl Alliance recommends this multipronged approach, especially for rare or collectible records.
- Budget Pick: Hudson Hi-Fi Anti-Static Brush — simple, effective, under $20.
- Premium Solution: Pro-Ject Vinyl Clean — a reusable antistatic gel that lifts deep-seated dust and static with a single press.
- Sleeve Upgrade: Invest in rice paper or HDPE antistatic sleeves for delicate pressings.
What actually works — and what doesn’t — will become clear when you see how habits and upkeep affect the long-term sound…
How To Keep Your Vinyl Collection Static-Free Longer
It’s one thing to zap static away for a single spin — it’s another to keep your entire collection crackle-free all season. The truth is, preventing static buildup is all about creating the right environment and sticking with habits that add up over time. So what really works long term?
- Maintain Consistent Humidity: Keep your listening room between 40% and 55% relative humidity. According to the Audio Preservation Society, arid air is the fastest way to turn records into dust magnets. If you’re in a dry climate, a small digital humidifier near your shelves is game-changing.
- Swap Out Old Sleeves: Ditch paper and plain plastic for anti-static inner sleeves — yes, it’s worth every penny. These block charge transfer and protect your grooves even during long-term storage.
- Ground Your Gear: Make sure your turntable, amplifier, and rack are all properly grounded to avoid introducing rogue charges every time you play. This is especially important if you use extension cords or power strips.
- Wear Natural Fiber Clothing: It sounds minor, but synthetic fabrics easily transfer static to records. Cotton and linen are your friends at playback time.
- Schedule Routine Cleanings: Set a monthly reminder to brush and wipe all records, even those you haven’t spun lately. Preventative maintenance is easier than deep cleaning ground-in dust later.
💡 Pro Tip: Store your collection vertically and away from heaters, direct AC vents, and windows. Sunlight and temperature jumps not only warp records but worsen static issues over time. Even a basic bookshelf can act as a buffer zone.
In practice: imagine going months without hearing a harsh pop or seeing a stubborn fuzz sticking to your vinyl. You swap an album, notice it slides out smoothly, no cling — that’s the power of paying attention to humidity, storage, and the right sleeves. Your records stay vibrant, your stylus lasts longer, and every play feels like a fresh listen.
Small steps, repeated consistently, make the biggest difference over time.
Your Records Deserve Pure Sound
If you take just one thing from this guide, let it be: fighting static isn’t about expensive gear, but simple habits that make all the difference. You’ve learned why static sticks to vinyl, what it does to your music, and which proven steps and tools keep records cleaner for longer. The main keyword — how to remove static vinyl records — isn’t a mystery anymore.
Think back to those frustrating crackles and clinging dust. Now, you know how to stop static at the source, prevent damage, and truly hear every note. It’s easier than it seems. Once you add these routines, your collection will sound fresher — and last far longer.
Which tool or tip are you most excited to try on your own records? Share your plans or questions in the comments below. Your experience could help another music lover, too!

Miles Aaron Sutton is a vinyl record enthusiast and turntable collector dedicated to helping music lovers set up, maintain, and grow their vinyl collections. With years of hands-on experience building home listening setups and hunting for records, Miles built Vsomi to be the honest, practical vinyl resource he always wished existed when he was starting out.