Imagine dropping the needle on a favorite record—only to hear dull, lifeless audio muddling your favorite track. No crackle, no detail, just disappointment. If that sounds familiar, you’re not alone in the frustrations of aging or ill-matched turntable cartridges.
Here’s the thing: letting those little issues slide means missing out on the warmth and detail your vinyl was made to deliver. Sticking with a tired stylus can fast-track wear on both your records and your patience, turning a relaxing experience into a recurring headache. You deserve better for your music and your gear.
Stick around and you’ll have a practical, jargon-free turntable cartridge guide upgrade that demystifies what matters, shows how to swap your stylus safely, and helps you savor clear, punchy sound. Ready? Let’s jump into that first groove.
Understanding How Turntable Cartridges Work
Ever wonder why some records sound crystal clear while others seem muffled or distorted— even when they’re spotless? The answer lives at the heart of your setup: the turntable cartridge. It’s not just a tiny component; it’s the translator that turns those microscopic grooves into music your ears crave.
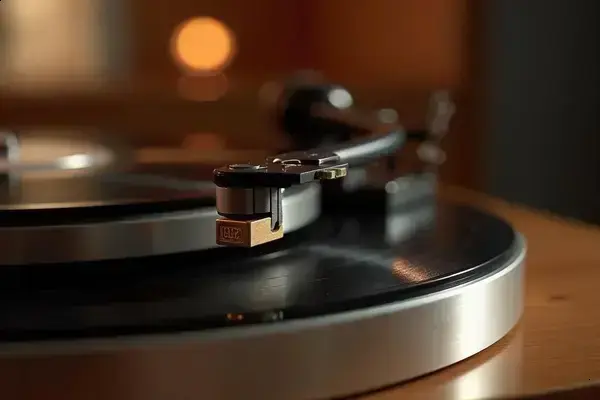
Here’s the thing: a cartridge is basically an electromechanical device that sits at the end of your tonearm. Its stylus (that needle tip) rides the grooves, causing a cantilever to vibrate. These vibrations get converted into electrical signals, which your amp and speakers finally transform into sound. But if you mix up the details—cartridge type, stylus shape, tracking force—you risk missing out on serious fidelity.
💡 Pro Tip: The Audio Engineering Society recommends matching your cartridge output (measured in millivolts) with your phono preamp’s gain. It prevents under- or over-driving your signal, which is a common cause of disappointing audio.
There are two main families: moving magnet (MM) and moving coil (MC). MM cartridges are more common, easier to replace, and forgiving with setup. MC cartridges, often used by audiophiles, deliver even more fine detail—but they need special preamps and are usually pricier to replace.
| Type | Strengths | Considerations |
|---|---|---|
| Moving Magnet (MM) | Affordable, easy to install, stylus replaceable | Larger moving mass may sacrifice some micro-detail |
| Moving Coil (MC) | High fidelity, nuanced sound, lower moving mass | Costly, needs special preamp, stylus usually not user-replaceable |
Picture this scenario: you invest in a quality vintage turntable. The sound is okay, but you notice certain records lack their original sparkle. Swapping out the cartridge for a modern MM model like the Audio-Technica VM540ML suddenly reveals textures you didn’t know existed. It’s not magic—it’s engineering that pays off.
According to Ortofon, a leading cartridge manufacturer, proper cartridge alignment and stylus care can extend both record and stylus life, minimizing wear and maximizing sonic detail.
But there’s one detail most owners completely overlook until it’s too late…
Signs Your Stylus Needs an Upgrade
How do you know when your stylus is quietly sabotaging your listening sessions? For many vinyl fans, the early signs are easy to miss—until the damage is done. That tiny diamond tip plays a massive role in keeping your music clean, detailed, and true to the original pressing.
The truth is: a dull or damaged stylus can masquerade as static, muffled mids, or even scratchy highs. Over time, you might notice surface noise increasing, a drop in your record’s dynamic punch, or the left and right channels sounding oddly unbalanced. Trust your ears—a subtle decline is often the stylus calling for help.
- Distortion, especially in vocals & cymbals
- Skipping or mistracking on undamaged records
- Noticeable loss of treble sparkle or bass response
- Excessive surface noise despite clean records
- Visual wear—jagged, bent, or flattened stylus tips
💡 Pro Tip: According to Shure (a trusted authority in audio equipment), stylus life typically ranges from 500 to 1,000 hours for elliptical tips—if properly maintained. Keep a log of usage, and if in doubt, inspect under good lighting with a magnifier at the first sign of trouble.
In practice: Imagine queuing up a favorite album and hearing a persistent fuzz, even after a deep clean. You swap records, fiddle with settings—but the haze remains. A quick peek at your stylus with a jeweler’s loupe reveals a chipped edge. Replacing it restores every last cymbal tap and breathy vocal just as the artist intended.
If you don’t address early warning signs, you’re risking not just subpar sound but permanent groove damage. That’s why Ortofon—one of the world’s most respected cartridge makers—recommends regular visual checks and prompt replacement at the first hint of wear.
And this is exactly where most people make the most common mistake…
How to Choose the Right Cartridge for Your Setup
Choosing the right cartridge for your setup can feel more like matchmaking than shopping—so many variables, so many promises. But which details actually matter? And how do you avoid overspending for specs you’ll never use?
Here’s the thing: factors like turntable compatibility, listening style, and system synergy affect your cartridge pick more than brand hype. You’ll see terms like compliance (how the stylus moves relative to the tonearm), output voltage, and stylus profile. For most home setups, moving magnet (MM) cartridges offer easy installation, robust sound, and affordable replacement costs. Audiophiles chasing absolute fidelity might lean toward moving coil (MC) designs, but only if their phono preamp is up for the task.
| Cartridge | Best For | Unique Features |
|---|---|---|
| Audio-Technica VM540ML (MM) | General listening, variety of genres | MicroLine stylus, 4.0mV output, forgiving setup |
| Ortofon 2M Blue (MM) | Balanced tone, pop and rock fans | Naked elliptical diamond, replaceable stylus, 5.5mV output |
| Denon DL-103 (MC) | Classic audiophile sound, jazz & classical | Low output (0.3mV), spherical tip, needs MC stage |
In practice: Picture this scenario—your mid-tier turntable sounds muddy with the stock cartridge. You’re into jazz and orchestral records. After consulting specs and your preamp’s input, you choose the Denon DL-103—a classic MC cartridge praised by Stereophile magazine and decades of audiophiles. Instantly, you notice more air and precision in every trumpet and string section.
- Check your tonearm’s mass (heavier arms match low compliance cartridges; lighter arms do better with high compliance).
- Match cartridge output to your phono preamp’s gain range.
- Consider upgrade paths—MM types let you swap styli without replacing the body.
- Factor in record condition. Nude elliptical or MicroLine styli track worn grooves better than conical tips.
💡 Pro Tip: The Audio Engineering Society recommends using cartridge alignment protractors and digital tracking force gauges for best performance. These simple tools help you avoid expensive groove or stylus wear from day one.
What actually works might surprise you…
Step-By-Step: Upgrading Your Stylus Safely
Worried about damaging your stylus or records during an upgrade? You’re not alone—it’s easy to feel intimidated when handling precise, delicate components, even with the promise of improved sound quality waiting on the other side. The truth is: upgrading your stylus is totally doable at home if you respect a few crucial steps and don’t rush the process.
- Replacement stylus or cartridge (confirm compatibility first)
- Small Phillips/flat-head screwdriver (if replacing cartridge)
- Needle-nose pliers or tweezers for headshell clips
- Soft microfiber cloth
- Magnifying glass or jeweler’s loupe (optional, for detailed inspection)
- Unplug your turntable from the power and disconnect cables. This protects both you and your gear from accidental jolts or slips.
- Remove the headshell or tonearm (depending on model). Handle everything by the mount or rear—never tug on the stylus tip!
- Carefully detach the old stylus. For most models, it slides or snaps off, but always consult your manual for specific instructions.
- Inspect the cartridge and contacts for dust, corrosion, or loose wires. Clean contacts gently with the microfiber cloth if needed.
- Attach the new stylus or cartridge, aligning with the body until you hear/feel a gentle click. Don’t force it—misalignment can ruin both components fast.
- Reconnect the headshell to the tonearm, making sure all connections are firm and straight.
- Re-calibrate tracking force and anti-skate to the cartridge manufacturer’s recommended settings. Use a digital scale for the best results.
- Test playback on a less valuable record first. Listen for distortion or skipping before trying your prized vinyl.
⚠️ Important Warning: Too much pressure or twisting can crack stylus assemblies and void your cartridge warranty. Both Ortofon and Audio-Technica stress that gentle handling with the right tools prevents most upgrade disasters—when in doubt, consult the documentation or a qualified service tech for your first swap.
In practice: You might have shaky hands the first time. That’s normal! Picture this scenario: you’re swapping the stylus on your Audio-Technica VM95E and set the tracking force with a $20 digital gauge. The difference is immediate—surface noise drops, detail jumps out, and your favorite albums finally sound like the records you fell in love with.
And this is exactly where most people make the most common mistake…
Expert Tips to Get the Best Sound From Your New Cartridge
So you’ve installed your new cartridge—now how do you make sure all that potential for great sound doesn’t go to waste? The real magic happens in the details, and here’s where a few expert moves turn “pretty good” into absolutely stunning playback.
- Double-check Alignment: Use a cartridge protractor to line up the stylus perfectly in the headshell. Even a millimeter off can blur your soundstage or shorten stylus life.
- Set Tracking Force Correctly: Measure with a digital stylus force gauge. Too much pressure makes records wear quicker. Too little? Expect nasty distortion and skipping.
- Adjust Anti-Skate: This tiny setting equalizes forces on each groove wall. If your stylus veers left or right, adjust anti-skate until it lands dead center on a blank disc.
- Keep Everything Spotless: Dust is the enemy—clean records, platter, and stylus regularly. Use a carbon-fiber brush for vinyl and a stylus cleaning gel or soft brush for the tip.
💡 Pro Tip: According to the British Audio Society, giving your records a deep cleaning after a cartridge upgrade can instantly reveal nuances you never noticed before—don’t skip this step!
In practice: Picture this scenario—after carefully aligning your Ortofon 2M Blue and dialing in exactly 1.8g tracking force, you clean a classic Coltrane LP and drop the needle. That opening sax phrase? It pops forward with clarity you never thought possible on your setup.
| Setting | Recommended Tool | Common Mistake |
|---|---|---|
| Cartridge Alignment | Protractor (plastic or printable) | Eyeballing by hand |
| Tracking Force | Digital force gauge | Trusting counterweight only |
| Anti-Skate | Blank test record | Ignoring after setup |
Small steps, repeated consistently, make the biggest difference over time.
Your Records Deserve This Upgrade
If you take just one thing from this turntable cartridge guide upgrade, let it be: nothing transforms your vinyl experience faster than a well-chosen, properly installed cartridge and stylus. Spot the signs of wear early, match your components carefully, and follow each expert tip—your ears (and your records) will thank you.
Maybe you started out guessing why things sounded dull or rough. Now you’ve got clear steps—confidence to swap that stylus safely, tools to get alignment right, and pro-level tips to unlock new layers of sound from every groove. Your setup’s tuned, and so are you.
What’s the first record you’re spinning after your upgrade—an old favorite or something brand new? Share your pick (and any questions) in the comments below. Let’s keep the music playing.

Miles Aaron Sutton is a vinyl record enthusiast and turntable collector dedicated to helping music lovers set up, maintain, and grow their vinyl collections. With years of hands-on experience building home listening setups and hunting for records, Miles built Vsomi to be the honest, practical vinyl resource he always wished existed when he was starting out.