
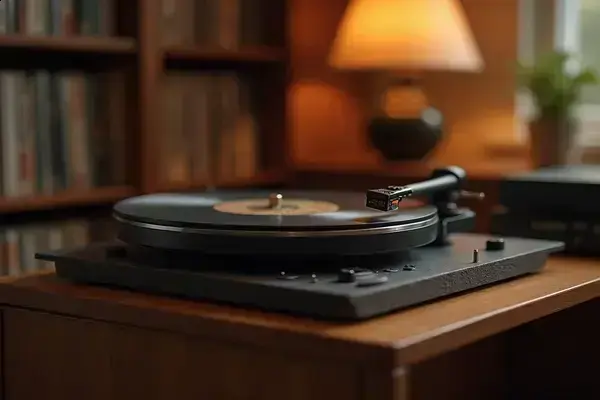
Picture this: you’re unboxing your brand new turntable, heart pounding with excitement, ready to finally spin your favorite record—and then you realize you might be missing something vital in the setup process. That sinking moment hits when you start worrying about scratching vinyl or muddling your music because something’s off with the alignment, cables, or tracking. The truth is, setting up a turntable can leave even audio veterans second-guessing whether they’ve really checked every box. The good news? By the end of this read, you’ll have a clear path with a turntable setup checklist printable at your fingertips—no more guesswork, just pure listening pleasure. Ready to experience your records the way they were meant to sound? Let’s get started.
Essential Tools And Gear For Your Turntable Setup
So, you’ve got the urge to set up your turntable—but what exactly do you need to get it sounding just right? Most first-timers imagine they can plug in a few cables and call it a day. In reality, the difference between muddled playback and smooth, crystal-clear audio usually comes down to having the proper tools and gear from the very start.
- Turntable (Manual or Automatic): The heart of your setup. Choose a quality deck from respected brands like Audio-Technica, Pro-Ject, or Rega for reliability.
- Phono Cartridge: This is what reads the grooves on your vinyl. Most decks ship with entry-level models, but upgrades are available. Look for names such as Ortofon and Shure.
- Phono Preamp: Essential unless yours is ‘built-in’—the preamp amplifies your record player’s signal so your speakers can actually hear it.
- Speakers (Passive or Powered): Powered speakers have their own amp, while passive models need an external amplifier or receiver. Both can sound phenomenal if matched well.
- Anti-Static Brush: Removes dust and static before you drop the needle—small but crucial in everyday use.
- Cartridge Alignment Protractor: Ensures your stylus hits the groove at the correct angle, preventing distortion and record wear.
- Tracking Force Gauge: Accurately sets the weight your stylus applies to your record—key for both sound quality and vinyl longevity.
💡 Pro Tip: According to the Vinyl Alliance, properly aligning your cartridge and setting tracking force within the manufacturer’s recommended range (commonly 1.5–2.5 grams) can extend both stylus and record life by years.
| Gear Type | Purpose | Top Brand Example |
|---|---|---|
| Turntable | Plays records | Pro-Ject Debut Carbon EVO |
| Cartridge | Translates grooves to sound | Ortofon 2M Red |
| Preamp | Boosts signal | iFi Zen Phono |
| Speakers | Delivers audio | Klipsch R-51PM |
In practice: Picture this scenario—an enthusiast orders a high-end turntable but skips buying a tracking force gauge, assuming “eyeballing it” is close enough. Weeks later, records sound dull and worn, and a new stylus is needed. It’s a classic newbie misstep that could’ve been avoided with a tiny investment.
The Japan Audio Society, a leader in international audio testing standards, confirms: matching compatible gear parts, using the right accessories, and calibrating with precision tools form the baseline for audiophile-grade performance at any budget.
But there’s one detail most owners completely overlook until it’s too late…
Placing And Leveling Your Turntable For Optimal Sound
Ever had your records sound oddly muted—or played with a hint of distortion—even after investing in quality gear? The culprit might be as simple as where and how your turntable sits. Proper placement and leveling is foundational. Miss it, and the rest of your system can’t perform at its best.
Here’s the thing: vibrations, slanting surfaces, or placement near speakers can introduce everything from subtle rumbles to serious skips and tracking errors. The International Association of Audio Engineers highlights that both cartridge wear and listening fatigue increase when a turntable isn’t perfectly flat.
- Pick Your Location: Choose a sturdy, vibration‑free surface—solid wood racks, dedicated stands, or wall-mounted shelves work best.
- Distance From Speakers: Keep the turntable as far from the speakers (especially subwoofers) as possible to avoid feedback or resonance.
- Check With a Bubble Level: Place a small spirit (bubble) level on different spots of the platter and plinth. Adjust the furniture legs or shelf until the bubble sits dead center everywhere.
- Fine-Tune The Feet: Most quality turntables have adjustable feet—twist them until the platter is perfectly horizontal from every angle.
- Double-Check Post-Setup: Spin a record; if the stylus drifts or you hear repeating thumps, tweak until resolved.
- Bubble level (spirit level)
- Sturdy stand or rack
- Adjustable turntable feet (if available)
- Optional: isolation pads
- Patience—precision counts
💡 Pro Tip: According to Rega Research, using dedicated turntable isolation bases or sorbothane feet can dramatically reduce vibration transmission—especially in apartments or older homes with flexible floors.
Picture this scenario: you set your turntable atop a gorgeous mid-century sideboard, only to discover the needle bounces slightly whenever someone walks past. Adding a vibration-absorbing platform transformed the sound—no more skips, just deep, consistent bass and clean mids. That’s the difference a level setup can make in real life.
| Placement Surface | Vibration Resistance | Ease of Leveling |
|---|---|---|
| Dedicated Stand | High | Easy (designed for adjustment) |
| Wall-Mounted Shelf | Very High | Challenging (requires installation) |
| Standard Furniture | Low to Moderate | Varies (may need shims) |
And this is exactly where most people make the most common mistake…
Connecting Components: Cables, Speakers, And Power
If you’ve ever battled hum, buzz, or a stubborn lack of sound when spinning a new record, you know what a hassle connecting your components can be. The truth is, even the most expensive turntable on the market won’t shine unless you set up your cables, speakers, and power with care. Messy connections mean more than inconvenience—they undermine the fidelity you paid for.
- Identify Your Output: Locate the RCA (red/white) or phono-out connectors on your turntable. Some models offer a built-in phono preamp—look for a “Line/Phono” switch to know which mode you’re using.
- Connect to Preamp or Receiver: Plug RCA cables into your preamp input if your table needs it, or directly to speakers if “Line” is selected. Double check: preamps amplify your turntable’s weak signal to line level so it’s audible.
- Route To Speakers: For powered speakers, use RCA or 3.5mm cables. With passive speakers, you’ll need an amplifier or receiver to bridge the gap, connecting with speaker wire and banana plugs (or bare wire, if needed).
- Ground Wire Setup: Almost all modern turntables offer a ground wire. Secure this to your preamp or receiver’s “GND” terminal—this step is crucial for eliminating hum.
- Safe Power Connection: Use a surge protector and ensure your cables don’t cross power cords to prevent interference. Avoid stacking your power supplies directly under your audio equipment.
- RCA cables
- Phono preamp or receiver
- Powered or passive speakers
- Speaker wire (if needed)
- Surge protector
- Grounding wire
⚠️ Important Warning: The Consumer Technology Association recommends always turning off your audio gear before swapping or attaching cables—improper handling can permanently damage sensitive components.
In practice: Picture this scenario—a new vinyl enthusiast rushes setup and skips the ground connection. The outcome? A persistent hum drowns out the detail on every track until a friend spots the loose wire. Plug it in, problem solved; music instantly sounds clearer and fuller. It’s those little details that separate frustration from satisfaction.
| Component | Connection Type | Key Tip |
|---|---|---|
| Turntable to Preamp | RCA + Ground Wire | Switch to “Phono” mode |
| Preamp to Speakers | RCA or 3.5mm (powered); Speaker wire (passive) | Match left/right channels |
| Power | AC cord to surge protector | Keep cords separated from signal lines |
What actually works might surprise you…
Fine-Tuning Tracking Force And Anti-Skate
Why does even a perfectly placed turntable sometimes produce sibilant highs or muddy lows? The answer often lies in two overlooked settings—tracking force and anti-skate adjustment. These tweaks are crucial for both protecting your records and unlocking true hi-fi sound. And honestly? It’s not as intimidating as the dials and numbers make it seem.
- Consult Your Cartridge Specs: Check the recommended tracking force (usually given in grams) in your cartridge’s manual or on the manufacturer site—most models are happiest between 1.5 and 2.5 grams.
- Zero The Tonearm: With the cartridge installed, remove the stylus guard, spin the counterweight until the arm floats perfectly horizontal, then set the scale ring to “0.”
- Apply Correct Tracking Force: Rotate the counterweight forward until the dial matches the spec you found—precise adjustment matters here.
- Set Anti-Skate Control: This knob balances sideways force so your stylus doesn’t pull in or out—match to your tracking force as a starting point.
- Test With A Record: Play a clean LP and watch the tonearm—does it drift to the center or edge? If so, fine-tune anti-skate in tiny increments until the arm stays centered in the groove.
- Digital tracking force gauge (for extra accuracy)
- Clean test record
- Cartridge stylus brush
- Cartridge manual or spec sheet
💡 Pro Tip: The International Federation of the Phonographic Industry notes that slightly lighter tracking force can reduce record wear—but going too light increases skipping. Always err toward the manufacturer’s recommendation for lasting clarity.
In practice: a friend’s cherished jazz LPs started developing an odd distortion around the edges. After a careful check, we found the tracking force had crept too low—just a quarter‑gram off. A quick recalibration cleared up the audio instantly and stopped further groove damage. Tiny adjustments, big impact.
| Adjustment | Purpose | Common Range |
|---|---|---|
| Tracking Force | Controls stylus weight on record | 1.5–2.5g |
| Anti-Skate | Balances outward tonearm force | Match tracking force (initially) |
But there’s one easy tool that transforms all these details into a smooth routine…
Printable Turntable Setup Checklist To Use Right Now
If you’ve ever wondered how to keep every piece of your turntable setup dialed in—without second-guessing yourself as you drop the needle—you’re not alone. Here’s the thing: even experienced vinyl lovers get lost in the details. That’s exactly why a printable checklist can be a game-changer for your system’s performance and your peace of mind.
This customizable checklist covers every essential step, from prepping your surface to setting tracking force. Each item features a check box so you can mark off progress as you go. Update it every time you reconfigure, clean, or upgrade your gear. And honestly? Keeping the checklist in your record cabinet saves you from endless Google searches or forgotten steps.
💡 Pro Tip: Print multiple copies—one for quick setups, another for deeper annual maintenance. The Audio Engineering Society recommends reviewing alignment and anti-skate at least twice yearly for consistent sonic quality.
- Turntable placement and leveling
- Correct cartridge installation
- Counterweight and tracking force set by spec
- Anti-skate dial matched to tracking force
- Verify all cable and ground connections
- Preamp or receiver selection
- Speaker or amp output checks
- Power and surge protection safety
- Test spin and listen for hum/skips
- Record cleaning and stylus maintenance reminders
In practice: picture this scenario—a friend moves apartments and, in the chaos, forgets to tighten the headshell. First play yields a severe channel imbalance. Using their personalized checklist, they spot the unchecked step, tighten up, and the music flows perfectly. Little boxes, big difference.
| Checklist Section | How Often? | Where to Keep? |
|---|---|---|
| Initial Setup | Once per new system or move | Record cabinet or turntable drawer |
| Routine Maintenance | Every 3–6 months | Folder with manuals/accessories |
| Troubleshooting | As needed | Digital scan on your phone |
The right habits in place now make everything easier from here.
Your Records Are Finally Ready
If you take just one thing from this guide, let it be this: having a clear turntable setup checklist printable turns guesswork into confidence, every single time. You now know how to choose your gear, get your setup perfectly level, connect everything with care, dial in tracking force and anti-skate, and keep your records sounding sweet with a tailored checklist.
Maybe before, setting up felt overwhelming or easy to mess up. Now you’ve got every step broken down and simple to follow. Your vinyl listening can finally be about the music—not the headaches. It just feels good.
What’s the very next thing you’ll check off your turntable setup checklist? Tell us below—I’m curious what you’ll tackle first!

Miles Aaron Sutton is a vinyl record enthusiast and turntable collector dedicated to helping music lovers set up, maintain, and grow their vinyl collections. With years of hands-on experience building home listening setups and hunting for records, Miles built Vsomi to be the honest, practical vinyl resource he always wished existed when he was starting out.