Picture this: you’ve just finished cleaning your favorite LP, only to notice water droplets clinging to the grooves. One wrong move and you might ruin that crisp, warm sound forever.
Rush the drying or use the wrong stuff, and static, warping, or residue can sneak up on your collection. I’ve seen so many great records fall victim to shortcuts — it’s enough to make any music lover cringe.
By the time you’re done here, you’ll know exactly how to dry vinyl records safely, step-by-step, so your albums always sound as good as you remember. Your next play deserves that clarity — let’s set your records up for their best encore yet.
Why Traditional Drying Methods Can Harm Your Records
Ever wondered why a favorite vinyl can sound perfect one month, then suddenly warp or hiss after a simple cleaning? The truth is, the way you dry your records often matters as much as how you clean them. Sadly, traditional drying methods — like propping up records to air dry or using a bath towel — might do more harm than good.
Why? Vinyl is sensitive. When water or cleaning solution lingers in the grooves or on the label, it can seep under pressure, leaving behind residue or even causing irreversible warping. Using rough or absorbent cloths isn’t much better: those microfibers can grind in dust, leaving hairline scratches invisible to the naked eye but all too obvious to your speakers.
⚠️ Important Warning: The Library of Congress preservation guidelines stress that direct heat (like hairdryers or sun) and improper airflow can permanently deform records, even at temperatures considered ‘safe’ for other household items.
Common Old-School Drying Methods
- Air drying vertically on a rack
- Wiping with kitchen towels or bathroom cloths
- Setting records near a window or heater
- Using a generic fan for ‘quick drying’
In practice: Picture this scenario — you clean a rare album, then lean it against a stack of books to drip dry. Seems harmless, right? A subtle bend forms near the edge where water pools. Over time, that bend can translate to warping that ruins playback fidelity forever. Or imagine using a towel borrowed from the kitchen: a tiny crumb or coarse fiber can etch a mark you’ll hear every spin.
| Method | Risks | Expert Guideline |
|---|---|---|
| Air Drying on Rack | Warping, uneven drying | British Library: Use lint-free cloth over air only |
| Direct Sun or Heat | Melting, label discoloration | Library of Congress: Never expose vinyl to direct heat |
| Household Towels | Scratches, lint, residue | Audio Engineering Society: Only use specialized microfiber cloths |
What actually works might surprise you — because modern safe-drying techniques are faster, safer, and leave your collection ready to shine…
What You’ll Need For Safe Vinyl Drying
You might be asking yourself — what do you actually need to dry vinyl records the right way, without taking unnecessary risks? Spoiler: the best results come from a few specialized tools that respect the unique needs of analog media.
- Microfiber Drying Cloths: Ultra-soft, lint-free cloths made specifically for vinyl. These pick up moisture without scratching and are a must-have for any collector.
- Record Drying Rack: A dedicated rack with wide slots supports records upright, allowing full airflow while keeping labels safe from drips. Avoid repurposing dish racks or improvised holders.
- Air Blower (Hand-Powered or Electric): Gentle air blowers help remove pooled water from grooves – but keep heat and pressure low to prevent damage.
- Distilled Water (Optional): For a final rinse, distilled water leaves no mineral spots or residue, safeguarding your grooves against build-up over time.
- Nitrile Gloves: These prevent skin oils from transferring onto the vinyl during the drying process, maintaining cleanliness and minimizing static attraction.
💡 Pro Tip: According to the Audio Engineering Society, replacing microfiber cloths after every 20-30 uses helps avoid particle build-up that can compromise your record’s surface and sound.
In practice: Imagine getting ready to dry a recently deep-cleaned LP. You set out a dedicated microfiber cloth, slip on nitrile gloves, and gently place the record in a rack positioned near a window (but out of direct sunlight). A quick burst from your hand blower clears lingering droplets, and you finish with a slow, careful wipe. These steps mimic the techniques used by professional archivists like those at the British Library Sound Archive.
| Tool | Purpose | Recommended Use |
|---|---|---|
| Microfiber Cloth | Absorb moisture, prevent scratches | Pat gently, replace regularly |
| Dedicated Drying Rack | Airflow, prevent warping | Upright slotting, avoid overcrowding |
| Air Blower | Remove water from grooves | Use on lowest setting, no heat |
But there’s one detail most owners completely overlook until it’s too late…
Step-By-Step: Drying Vinyl Records Without Causing Damage
Ever felt a twinge of anxiety setting a clean, wet record down, hoping for the best? Drying vinyl isn’t guesswork—there’s a proven method to keep albums flawless for years. Here’s how to dry vinyl records safely, straight from archival best practices and decades of collector wisdom.
- Microfiber drying cloth (dedicated for records only)
- Vinyl record drying rack or stand
- Hand-powered air blower or bulb duster
- Nitrile gloves (optional, for avoiding fingerprints)
- Distilled water (for final rinse, if applicable)
- Pat the Surface: Lay the record flat on a clean, lint-free microfiber cloth. Starting at the inner groove, gently pat rather than rub—never use circular or aggressive motions.
- Use an Air Blower: Hold a hand bulb blower 2-4 inches above the surface. Gently blow away any pooled liquid from the grooves and label area, focusing on stubborn droplets that towels can’t reach.
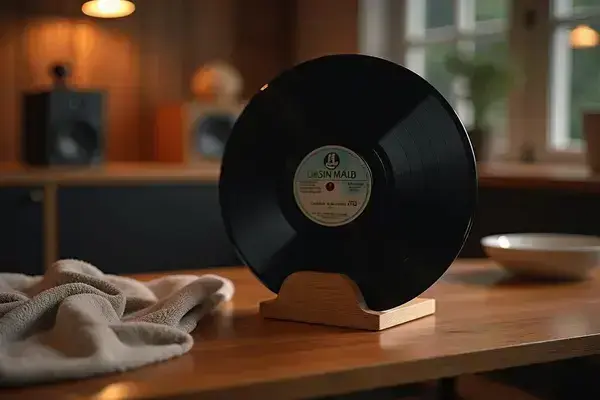
- Stand and Air-Dry: Place the record vertically in a specialized vinyl drying rack. Make sure the rack has adequate space between slots for airflow but keeps labels away from any moisture runoff.
- Allow Natural Drying: Position the rack in a dust-free, room-temperature area with mild air circulation—never direct sunlight, heat vents, or open windows.
- Final Inspection: After 30–60 minutes, inspect both sides for remaining moisture or residue. If needed, repeat a gentle pat with a fresh microfiber cloth before filing back into an antistatic sleeve.
💡 Pro Tip: According to the Library of Congress, skipping the blower step can leave micro-droplets in the grooves, leading to residue build-up or mold in humid regions. This tiny effort has a huge payoff for your collection’s longevity.
Picture this scenario: You’ve just finished cleaning a first-pressing jazz LP. Instead of rushing, you follow each drying step—careful pats, air blower, upright rack. Six months later, that record’s still as pristine and vivid as the day you cleaned it, while friends who cut corners notice skipping and static build-up.
And this is exactly where most people make the most common mistake…
Common Mistakes To Avoid After Wet Cleaning
Think your records are safe as soon as the water’s wiped away? Here’s the thing—what you do (or don’t do) in the next hour can make or break your vinyl’s lifespan. Most collectors, no matter how diligent, fall into a few classic traps after wet cleaning.
- Stacking or Shelving Before Fully Dry: Even a trace of moisture trapped in the sleeve can lead to mildew and that infamous “musty” vinyl smell.
- Skipping Label Protection: Labels are paper—any drips can cause bleeding, bubbling, or permanent stains. It’s easily overlooked when you’re drying quickly.
- Using Dirty or Overused Cloths: If your microfiber cloth has particles or isn’t fresh, you risk redistributing dirt or scratching those precious grooves.
- Rushing the Process: Setting your record near a heat source, aiming a fan at full blast, or cutting drying short just to file it away can warp or distort—subtly, but enough to ruin play quality in the long run.
⚠️ Important Warning: The British Library’s official preservation advice states that improper post-cleaning storage is a leading cause of surface mold and label deterioration in archival collections. If in doubt, let the record air longer than you think is necessary.
In practice: You clean a stack of LPs on a Sunday afternoon, then slip them back into sleeves out of habit. Months later, fuzzy white patches start creeping along the edges. Or maybe you pull a favorite to spin, only to notice the center label warped and bubbled. Sound familiar? These issues can take just one shortcut to start.
| Mistake | Risk | How to Avoid |
|---|---|---|
| Premature shelving | Mold or label rot | Wait until completely dry |
| No label protection | Permanent stains or warping | Blot with dry cloth, keep upright |
| Dirty cloth reuse | Fine scratches, noise | Replace or wash cloths often |
| Direct heat/fan | Edge warping, label lifts | Only use ambient air |
What actually works might surprise you…
Tips To Keep Your Vinyl Collection Pristine Long-Term
If you’re serious about keeping your vinyl collection sounding spectacular for decades, you’ll need more than just a solid cleaning routine. The secret? Developing a handful of habits that protect your records day in and day out—far beyond drying.
- Store Vertically: Always place your records upright, never stacked. Warping and ring wear creep in when horizontal pressure builds up over time, according to preservation experts at the Library of Congress.
- Control Humidity and Temperature: Aim for a stable environment—ideally 45-50% relative humidity and between 65-70°F. Fluctuations invite mold or crackly static and can even make vinyl brittle in extreme cold.
- Anti-Static Sleeves: Switch to antistatic, high-density polyethylene inner sleeves. They help reduce dust, lint, and static that cause pops with every spin.
- Clean Stylus Regularly: A dirty stylus is a silent killer, gradually embedding gunk into your grooves and dulling the soundscape. A stylus brush or electronic cleaner, like those recommended by Audio-Technica or the British Library, makes a difference.
- Hands Off the Grooves: Only handle records by the outer edge and labeled center—your fingers leave oils that attract dirt and trigger long-term groove damage.
💡 Pro Tip: Periodically rotate your most-played albums to the back of the shelf and bring neglected ones to the front. This simple shuffle evens out pressure points and airflow, helping sleeves and jackets last longer—straight from the digital archiving standards of the International Association of Sound and Audiovisual Archives.
Checklist for Lasting Vinyl Care
Picture this scenario: You walk into a room where your vinyl sits upright on oak shelves, each inside a crisp antistatic sleeve. There’s a hygrometer nearby, the air perfectly balanced. Your stylus gets a quick clean every weekend, and you instinctively grab each album by its edge. That’s how your collection stays timeless, no matter how many times you revisit your favorites.
| Habit | Why It Matters | How Often? |
|---|---|---|
| Vertical Storage | Prevents warping & ring wear | All the time |
| Humidity/Temp Control | Blocks mold/static/brittleness | Continuous |
| Antistatic Sleeves | Protects grooves & label | Every record |
| Stylus Cleaning | Avoids dirt transfer | Weekly or before each session |
| Edge Handling | Stops oil/dirt buildup | Every use |
Small steps, repeated consistently, make the biggest difference over time.
Your Records Deserve This Care
Drying vinyl records safely isn’t only about avoiding disaster—it’s the key to getting the best sound, the longest record life, and listening you can trust. If you take just one thing from this guide, let it be: using the right drying technique protects your favorite albums far beyond just cleaning. Focus on airflow, gentle materials, and patience—that’s how you keep your collection pristine.
Before, drying might have felt risky or confusing. Now, you know the steps, the mistakes to dodge, and the durable habits that make all the difference. It’s not complicated, but it does matter. Your albums—and your ears—will thank you every single spin.
Which of these steps surprised you the most, or have you ever had a close call with a favorite record? Let’s hear your stories in the comments below!

Miles Aaron Sutton is a vinyl record enthusiast and turntable collector dedicated to helping music lovers set up, maintain, and grow their vinyl collections. With years of hands-on experience building home listening setups and hunting for records, Miles built Vsomi to be the honest, practical vinyl resource he always wished existed when he was starting out.